Abeeway Mobile APP is compatible with the following tracker models:
- Abeeway Micro Tracker V3.0, V3.1
- Abeeway Industrial Tracker V2
- Abeeway Compact Tracker
- Abeeway Smart Badge
Abeeway Mobile APP is NOT compatible with the following tracker models:
- Abeeway Micro Tracker V2
- Abeeway Industrial Tracker V1
If you are not sure about the tracker model, it can be derived based on LoRaWAN DEVEUI. For more information, see Abeeway updater documentation (refer to section: MCU Firmware and Hardware Model Compatibility)
The minimum firmware versions compatible with the mobile APP
- MCU/Application Firmware Version: 2.2.x
- Bluetooth Firmware Version: 3.3.x
Note:
- If you are running Abeeway Mobile Version 1.0.2 and below, it is important to run MCU Firmware 2.2.x.
- For Abeeway Mobile App Version > 1.0.2, it is important to run MCU Firmware >= 2.3.x on the tracker.
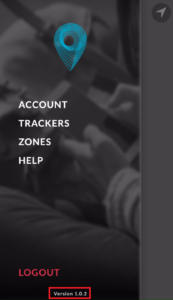
- The mobile app version can be found from the Abeeway Mobile app main menu (See screenshot below. The mobile app version in the example below is 1.0.2):
Please ensure to flash the right tracker configuration in the tracker. The example configuration file can be downloaded from here (see section: Firmware Update)
Please refer to Abeeway updater documentation for updating the firmware
We usually ship Abeeway trackers preconfigured with public LoRaWAN network. Abeeway trackers are compatible with any LoRaWAN network. However, it is important that the trackers are routed to the ThingPark location backend before adding the trackers to the mobile App. The routing profile to set from different LoRaWAN platforms to different ThingPark Location platforms can be found here (see AN-017_Mobile APP Getting Started Guide: section 2.2/2.5). If you are using some other LoRaWAN platform, please contact us.
The mobile APP has two types of roles:
- End user: By default, all the mobile APP users when registered to the mobile APP for the first time are assigned the role of “end-user”
- Admin user: This role provides the following additional features (developer mode, firmware update without adding the tracker)
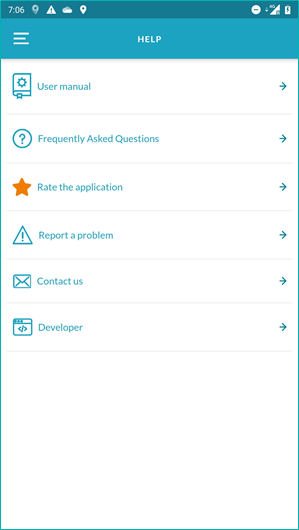
The admin user role is most suited for distributors/system-integrators/operations team members that are responsible for administration and management of the trackers. The admin user role can be requested to your local distributor or by clicking “report a problem” from the HELP menu.
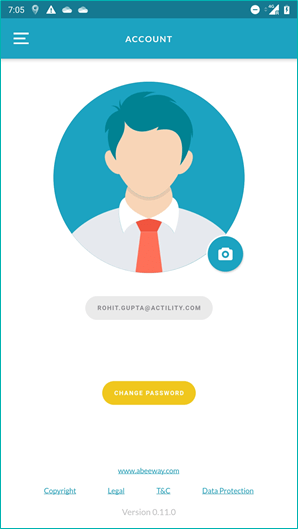
The password can be changed from the account settings page (if you are logged in) by clicking “CHANGE PASSWORD” button.
The password can be reset by clicking “SIGN UP/SIGN UP” button
When the tracker is connected over Bluetooth with the mobile phone, then the tracker’s LoRaWAN functionality is disabled and the phone’s position is sent to the backend. The tracker resumes its LoRaWAN functionality when it is disconnected over Bluetooth with the mobile APP.
Note: During the process of adding the tracker, please do not put the app in backround or perform any heavy data activity over Bluetooth with your smart phone (for ex. playing music over the Bluetooth headset) as this might create delays between the tracker and the mobile. You can resume this activity once the tracker is added to the account.
Here are the key steps to add the tracker to the account:
Step 1: Ensure the tracker has successfully joined LoRaWAN network and has sent at least one uplink to ThingPark Location backend (which is linked to the distributor you selected when creating the mobile app account on sign in/sign up page).
Step 2: Ensure the tracker and the phone has no Bluetooth bond
Before starting to add the tracker, its important that there is no Bluetooth bond on the tracker and also the phone for this specific tracker.
The Bluetooth bond on the phone can be easily removed by clicking on “FORGET” button on the mobile phone. Abeeway devices always start with prefix ABW followed by last 9 digits of DEVEUI
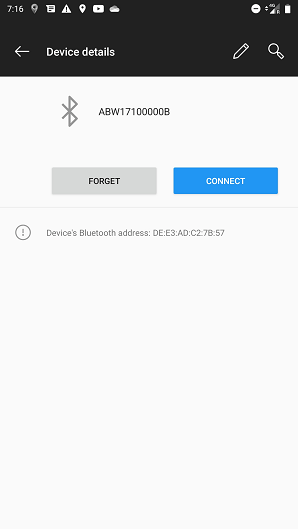
Note: The screenshot above is for Android 9. The procedure to remove Abeeway tracker from phone’s Bluetooth device will be different for iOS or other Android phones.
The Bluetooth bond on the tracker can be removed in any one of the following ways:
- With the button sequence (easiest):
- MCU Firmware 2.2.x and below. Ensure the tracker is switched off with the long button press, followed by the button sequence <1 long press , 6 short press, 1 long press>, then switch on the tracker with long press. The tracker will beep with advertisement melody if the operation was successful (This is applicable only to Micro Tracker/Smart Badge)
- MCU Firmware 2.3.x and above. Hold the button for more than 14 sec to enter ESC sequence. The tracker will play melody indicating the fact that special sequence can be started. Once inside the special sequence, do the following: 1 click, 1 click, 1x press (between 1 – 4 sec). If the sequence is successful, the tracker will play Bluetooth advertisement melody indicating the Bluetooth bond is removed for about 10 minutes (which is the default configuration). (This is applicable only to Micro Tracker/Smart Badge)
- Sending the LoRaWAN downlink ff0202 on downlink port = 2 to the Abeeway tracker (This is applicable to ALL trackers)
- Reed Switch Sequence. The special magnet sequence can be used to activate Bluetooth on the compact tracker if there is no Bluetooth bond on the tracker. The compact trackers are shipped with default value of reed_switch_configuration=3. For more information on reed switch sequence, visit here. The video showing this procedure is here
- Using CLI with the tracker connected over USB port. The tracker can be connected to USB port and then communicate it with serial tool like Tera term. Once connected to Tera term, enter the password “123” as this is the default password to interact with the tracker. Then type “ble clear” to clear the Bluetooth bond on the tracker. For more information, please refer to CLI user guide.
Step 3: Trigger the tracker to advertise itself over Bluetooth
For Micro Tracker/Smart Badge: Restart the tracker with long button press. The tracker will advertise itself for 10 minutes to allow pairing with the tracker. The tracker will beep with advertisement melody if the operation was successful. (See here for how to restart the tracker with button sequence)
For Compact Tracker: Activate the Bluetooth with the magnet sequence (see here for the sequence)
For ANY Tracker: Send the downlink ff020b0064 on LoRaWAN downlink port = 2. The tracker will advertise itself for 100 seconds to allow pairing with the phone. You can change the duration of advertisement using Abeeway Driver (see section: Start and Stop BLE advertisement)
Step 4: Search the tracker in mobile APP
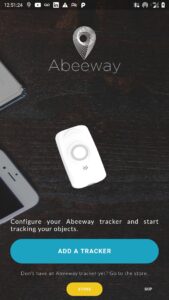
Open the mobile app and goto the screen “ADD A TRACKER”
Once the tracker is found matching the last 9 digits of DEVEUI, then click the button “ADD TRACKER TO THE ACCOUNT”
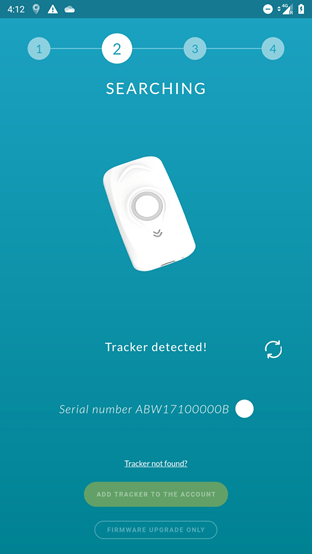
If the tracker is not found in this step, please go back to step 2.
Step 5: Add the tracker to the account
During the addition of the tracker, mobile APP will pair with the tracker. This process can take few minutes. Please do not close the mobile APP or turn off the tracker during this process.
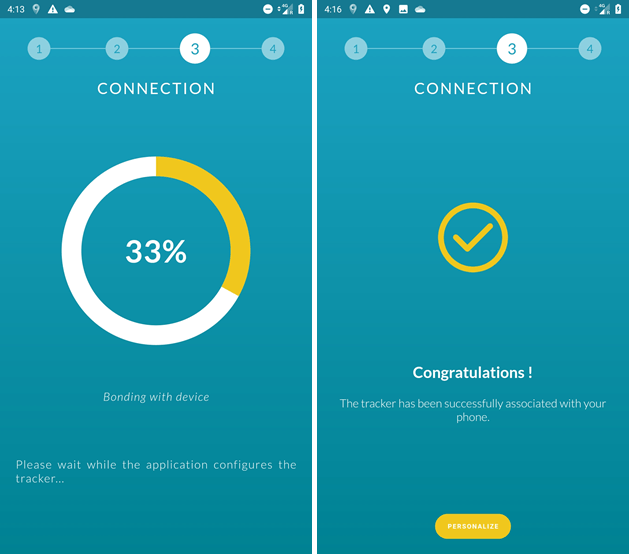
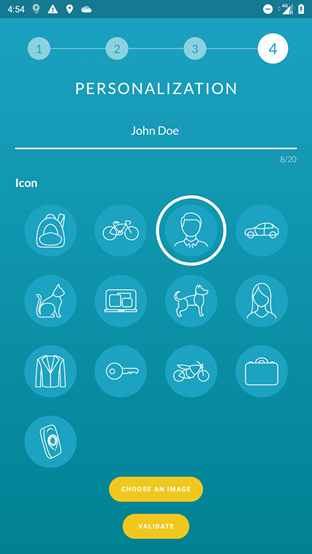
Step 6: Personalize the tracker
In this step, you can assign the friendly tracker name and image to the account
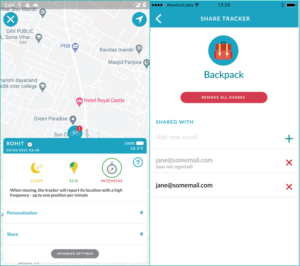
The tracker has three different profiles which can be changed from “ADVANCED SETTINGS” page.
- Sleep: In this profile, tracker is sending positions every one hour
- Economy: In this profile, tracker is sending positions every hour and also every 20 minutes when moving
- Intensive: In this profile, tracker is sending positions periodically every 30 minutes and also every 2 minutes when moving.

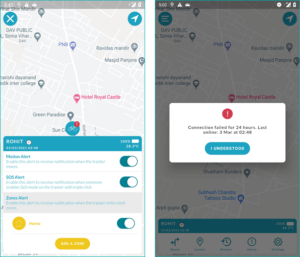
Abeeway Mobile APP allows to setup the following alerts:
- Motion Alert: If this alert is setup, the mobile APP will show notification when the tracker is in motion
- SoS Alert: This alert will show push notification ff the SoS is triggered from the tracker (with triple click on the button). (Applicable to Smart Badge/Micro Tracker only)
- Zones Alert: This alert will enable push notifications when the tracker enters or exits geofence zone
Apart from the above alerts, there are also alerts shown in the mobile APP when the tracker loses LoRaWAN connectivity:
- Orange Alert: the connection has been lost for 1 hour
- Red Alert: the connection has been lost for at least 24 hours
Geofence zones can be created by clicking the “ZONES” button on the main menu. However, zone alert must be setup to receive alerts when the tracker enters or leaves geofence zone
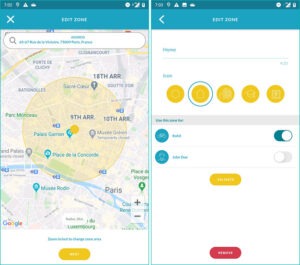
You can click on the “SHARE” button on the tracker view page and then enter the email of the user with which you want to share the tracker
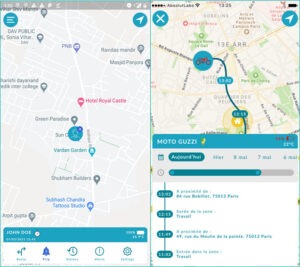
Tracker interactive history can be viewed by clicking “History” button on tracker view page and then selecting appropriate date range.
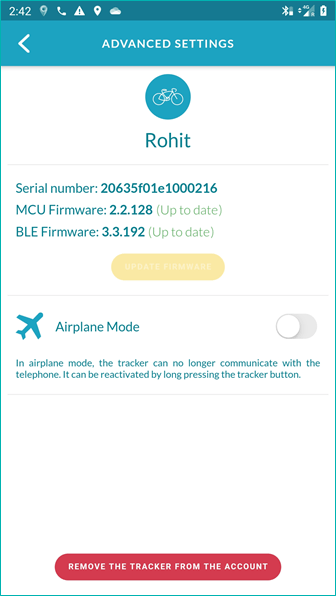
Firmware update can be easily carried out by clicking “UPDATE FIRMWARE” button on advanced settings page.
Note:
1. During the process of firmware update, please do not perform any heavy data activity over Bluetooth with your smart phone (for ex. playing music over the Bluetooth headset) as this might create delays between the tracker and the mobile. You can resume this activity once the firmware update is completed successfully.
2. If you are performing MCU Firmware update, please do it in the presence of LoRaWAN network as the tracker will reset after the firmware update triggering the LoRaWAN join procedure
Note: If you wish to upgrade the firmware with custom firmware binary and config file, please REPORT A PROBLEM from the app HELP menu asking to upgrade your account to the admin profile. The admin profile is reserved to operations team, distributors and advanced users.
The tracker can easily removed from “ADVANCED SETTINGS” page by clicking the button “REMOVE THE TRACKER FROM THE ACCOUNT”. We recommend to remove the tracker from the account only when its connected over Bluetooth with the mobile APP. This will ensure Bluetooth bond on the tracker is removed properly so it can added to the mobile app again. However, If the tracker is not connected over Bluetooth and request is made to delete the tracker from the account, ThingPark location will send the downlink to remove Bluetooth bond on the tracker (which can take upto 20 minutes depending on the tracker being in LoRaWAN coverage). During this 20 minute period, you will not be able to add the tracker to your account. Please note that the downlinks can get lost due to tracker not being in the range of LoRaWAN network. If the Bluetooth bond is not removed with LoRaWAN downlink, it can be removed manually (see FAQ page in HELP menu for instructions to remove Bluetooth bond manually from the tracker)